
Polymer Clay Push Molds Art Doll Face Cab Tutorial
The Enchanted Gallery flexible push molds work best with polymer clay or materials that do not need to be thicker than 1/4" to 1/2" (such as art doll faces, jewelry and buttons.) My molds are made for jewelry and are not deep enough for soap bars, only thin inclusions or cameos. There are no even sides or backs for poured materials.

The Enchanted Gallery's Flexible Push Mold Basics:


***Tips on painting, coloring and bringing out the details of your polymer clay cabs***
Before you bake your clay:
A toothpick or needle can be your best friend! If your mold lacks details such as defined eyes, mouth , nostrils, etc. don't be afraid to make them more pronounced. Even add new lines or fancy designs to your cab, never let your mold limit your creativity! I love using Perfect Pearls Metallic Mica Powders. You can use a fluffy paint brush to dust your clay cab, however you get a lot more detail on intricate designs if you lightly coat the tip of your finger with the powder. Dab powder gently onto your cab's raised areas and allow the dark clay crevices to show through.
After baking your clay:
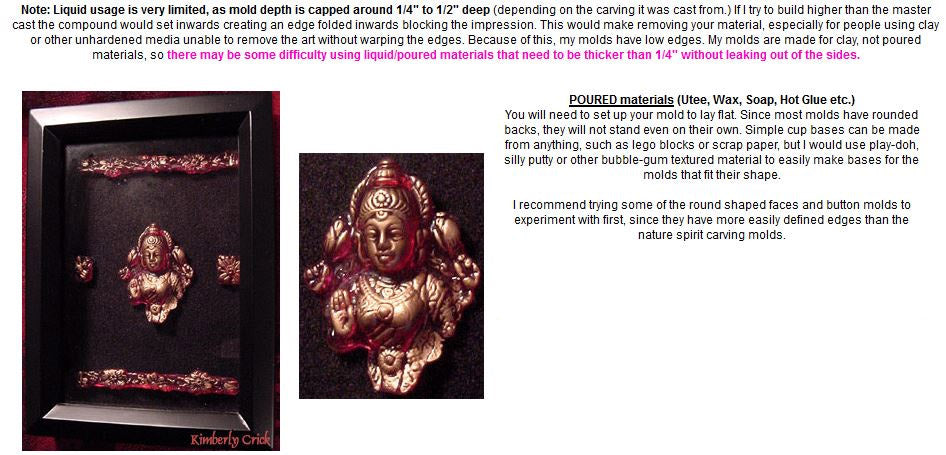
If you are working with a clay color that you would like to completely cover up, I recommend using a quality acrylic paint. If you have a lot of time you can use multiple colors to fill in each detail. Usually I just use one color (like the gold Lumiere brand paint shown above.)
A toothpick or needle can be your best friend! If your mold lacks details such as defined eyes, mouth , nostrils, etc. don't be afraid to make them more pronounced. Even add new lines or fancy designs to your cab, never let your mold limit your creativity! I love using Perfect Pearls Metallic Mica Powders. You can use a fluffy paint brush to dust your clay cab, however you get a lot more detail on intricate designs if you lightly coat the tip of your finger with the powder. Dab powder gently onto your cab's raised areas and allow the dark clay crevices to show through.
After baking your clay:
If you are working with a clay color that you would like to completely cover up, I recommend using a quality acrylic paint. If you have a lot of time you can use multiple colors to fill in each detail. Usually I just use one color (like the gold Lumiere brand paint shown above.)
Sealers:
I have used water based Polycrylic spray by Min Wax or Sculpey glaze on polymer clay with no ill effects. I have heard reports of Krylon and other sprays that are not water based, or with chemicals in the propellant, that cause the finish to become sticky several months later. Varathane by RustOleum has been widely recommended as a brush on sealer for clay. There is also a more expensive spray sealer on the market that specifically states that it is safe to use with Polymer clay and it is called PYM II. To add a color tint to your sealer add a drop of acrylic paint or stamping inks. Sculpey glaze, like most other clear drying sealers, can be mixed with any color acrylic paint you want and will settle into the deeper areas of your cabs, doing your highlighting job for you.
Easy polymer clay jewelry using metal pendant blanks:
Once you have pressed your clay into your mold for an impression, remove from mold and place on a ceramic tile/sturdy surface. Take a blank pendant tray and press it gently down onto your clay to create an outline. Cut out using an x-acto knife/razor blade. Gently place the clay into your pendant, making sure it fits well. This is a good time to apply a finish such as Perfect Pearls, a metallic pigment powder that sticks to the raw clay.

Lastly, glue it back in place with a strong adhesive rated for plastic to metal adhesion (I use E-6000)
Customer art examples of how you can add acrylic paint to your baked molded clay to make your own personal customization:


A note about Utee: You'll have to pour already heated embossing powder into the mold. Don't try to heat the powder inside the mold with a heat gun. Use a melting pot such as the "melt art pot" by Suze Weinberg / Ranger Ink. After your cast has cooled a simple way to bring out the details is to gently rub metallic paint over the surface (Rub 'n Buff brand metallic finishes in small tubes work best.)

 <-- PMC ring by Michelle Ink Designs at runforsanity.etsy.com


Note: this page contains affiliate links. All product opinions are my own. I am committed to honest reviews showcasing both the pros and cons of each product. I have not received payment from any brand for a review. I earn a commission from sales made through this web page's clickable banners or links to Amazon, Arteza, Scrapbook, Jackson's or Blick Art Materials websites.